Introduction: Your Journey Begins on the Mat
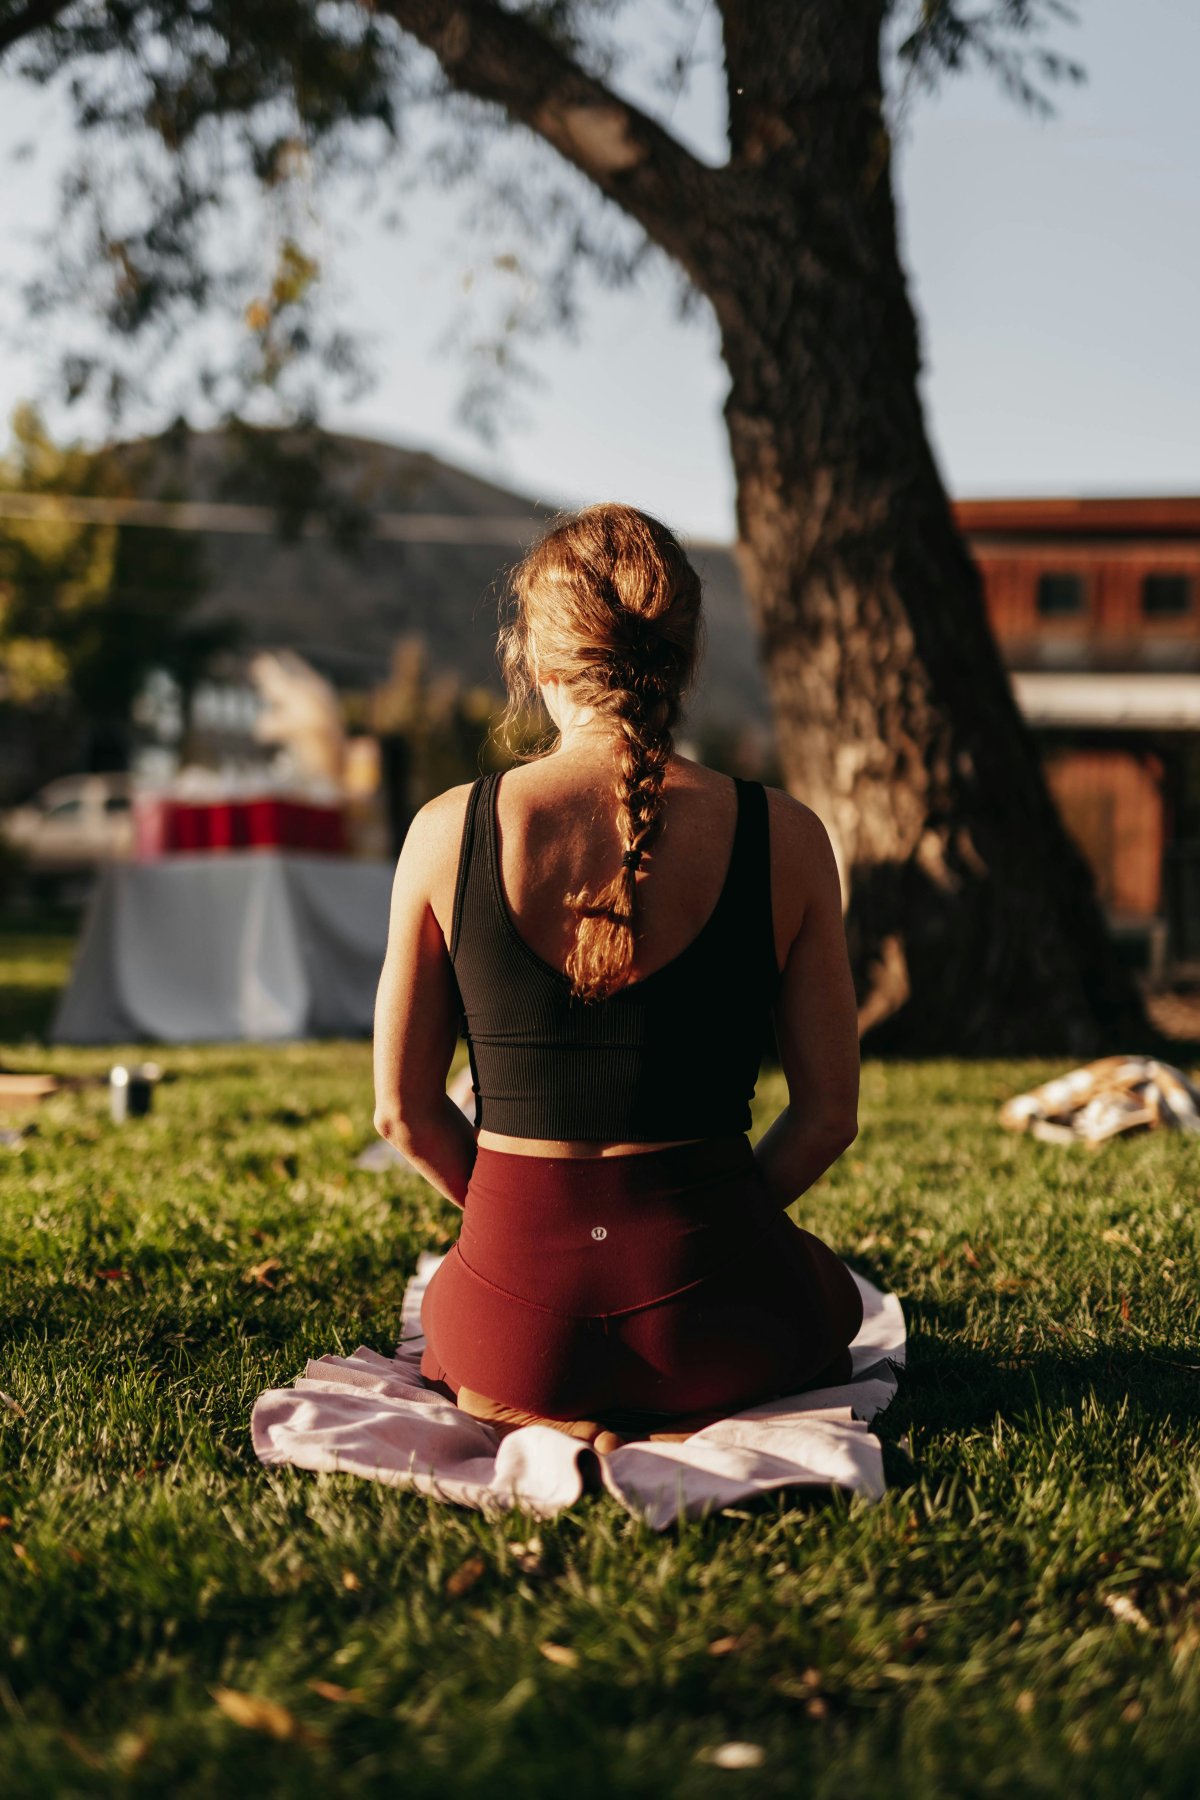
In a world that moves at an increasingly frantic pace, yoga offers something genuinely rare: a space to slow down, breathe deeply, and reconnect with yourself. For thousands of years, this ancient practice has helped people cultivate physical strength, mental clarity, and emotional balance. Today, modern science is catching up with what yogis have known for centuries, confirming that a regular yoga practice can reduce stress, improve flexibility, enhance cardiovascular health, and contribute to an overall sense of well-being.
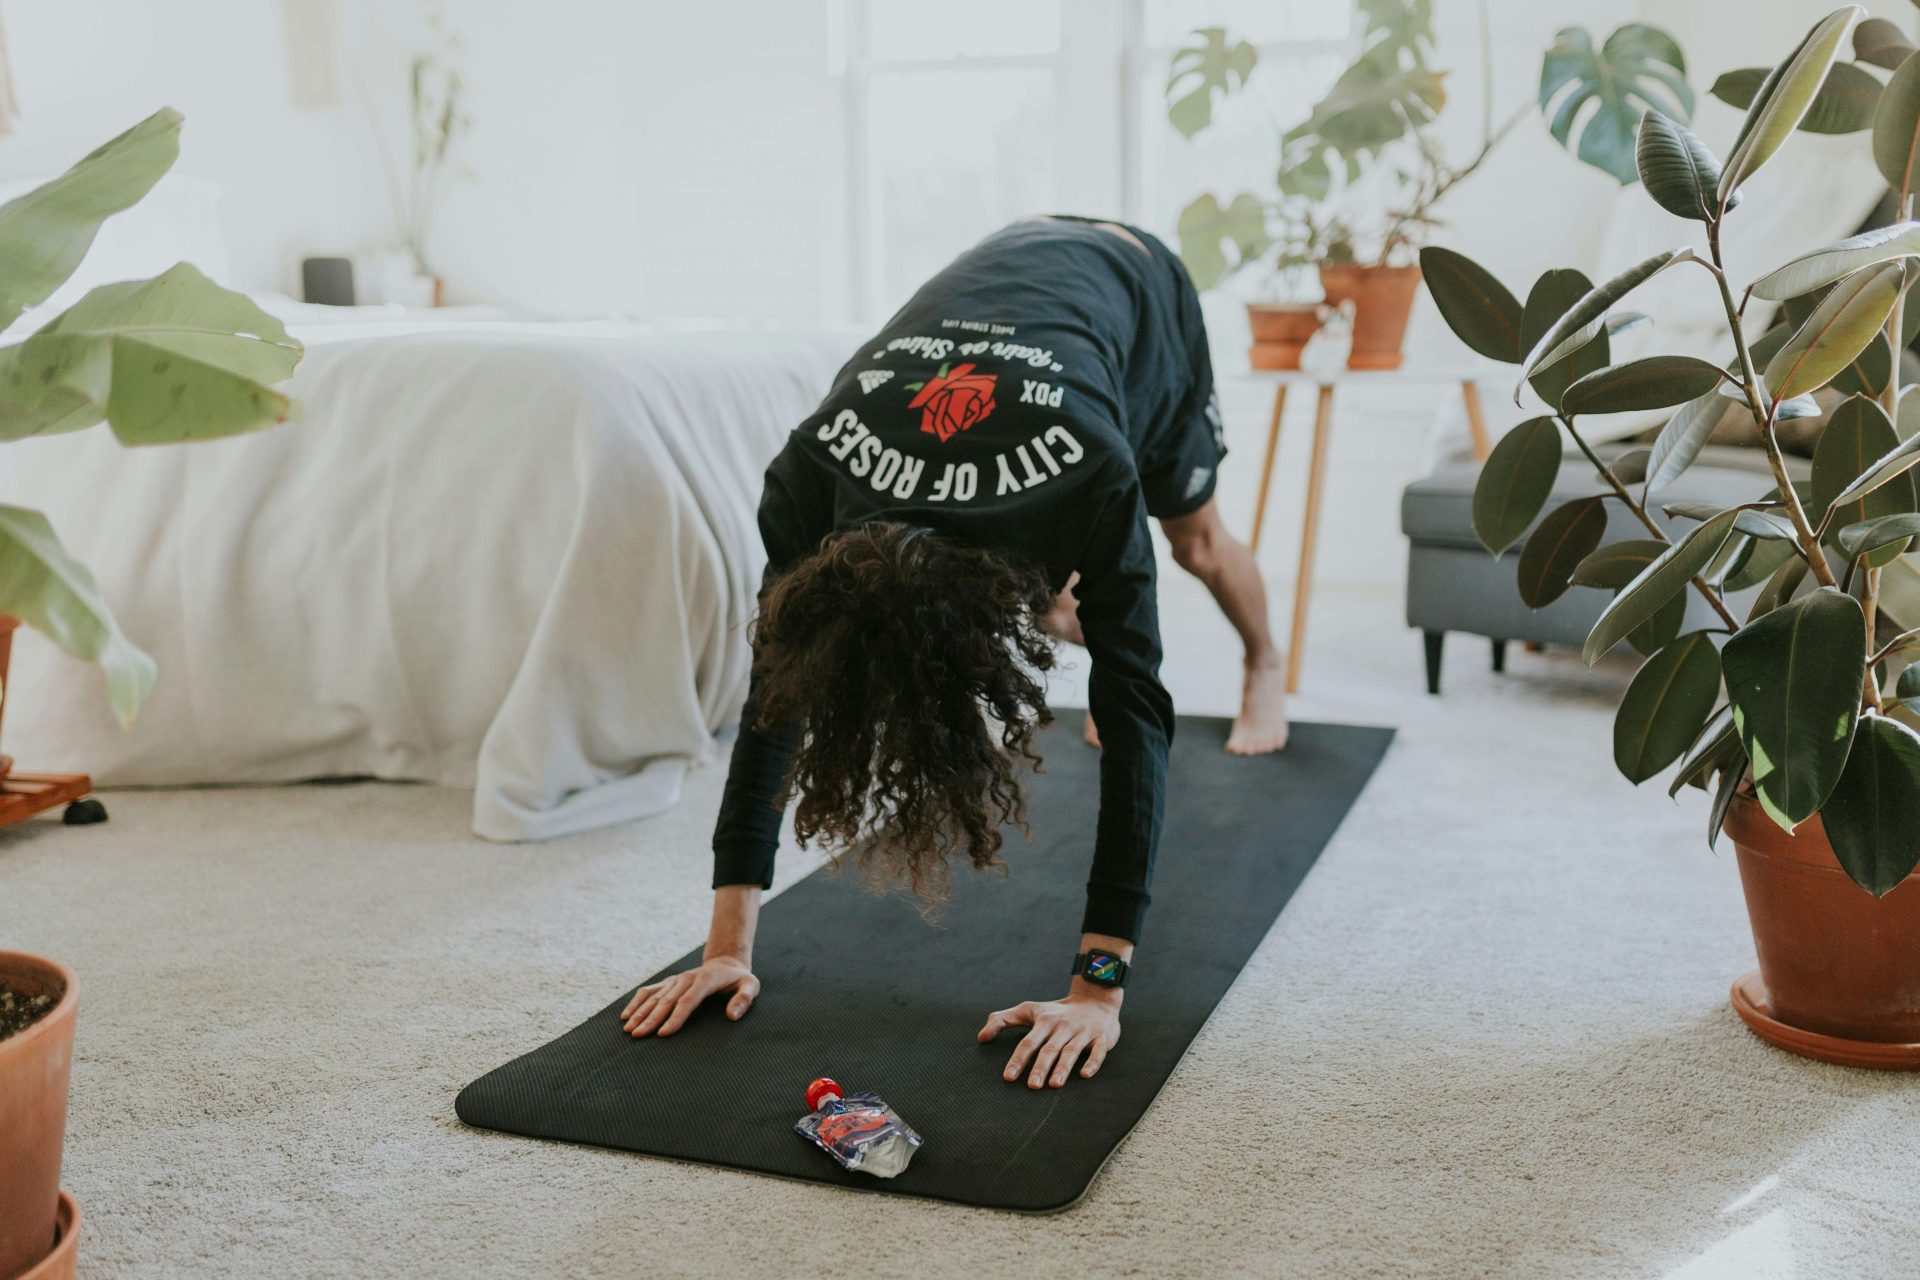
If you have never practiced yoga before, the prospect of walking into a studio or even unrolling a mat at home can feel intimidating. Images of impossibly flexible practitioners twisting themselves into pretzel-like shapes can create the impression that yoga is only for the naturally bendy or the athletically gifted. Nothing could be further from the truth. Yoga is for every body, regardless of age, fitness level, or flexibility. The practice meets you exactly where you are and grows with you over time.
This comprehensive guide is designed specifically for beginners. It will introduce you to the foundational poses that form the building blocks of any yoga practice, explain proper alignment to keep you safe, and provide practical advice for establishing a consistent routine. Whether your goal is to touch your toes for the first time, find relief from work-related stress, or simply explore a new form of movement, this guide will set you on the right path.
What Is Yoga, Really?
Before diving into the physical postures, it is helpful to understand what yoga actually is. In the West, yoga is often equated with the physical practice of poses, known as asanas. However, in its original context, yoga is a holistic philosophical system that encompasses ethical living, breath control, meditation, and physical discipline. The word yoga itself comes from the Sanskrit root yuj, which means to yoke or unite, reflecting the practice’s goal of unifying body, mind, and spirit.
The physical practice of asana was originally developed to prepare the body for long periods of seated meditation. By releasing tension and building strength, the poses made it possible to sit comfortably and quietly, free from the distraction of physical discomfort. Today, many people practice yoga primarily for its physical benefits, and that is perfectly valid. However, even a purely physical practice tends to open the door to the deeper aspects of yoga over time, often in ways that surprise and delight the practitioner.
The Eight Limbs of Yoga
The classical framework of yoga, as outlined by the sage Patanjali in the Yoga Sutras, consists of eight limbs. While a full exploration of each limb is beyond the scope of this article, a brief overview provides helpful context. The eight limbs are: Yama (ethical restraints), Niyama (personal observances), Asana (physical postures), Pranayama (breath control), Pratyahara (withdrawal of the senses), Dharana (concentration), Dhyana (meditation), and Samadhi (absorption or enlightenment). As you can see, the physical postures are just one part of a much larger system.
For beginners, understanding this broader context can relieve the pressure to be perfect at the poses. You are not failing at yoga if you cannot touch your toes or balance on one leg. The poses are tools, not tests. What matters most is showing up, paying attention, and breathing through whatever arises.
Getting Started: What You Need to Know
One of the most appealing aspects of yoga is that it requires very little equipment. At a minimum, all you need is a yoga mat to provide cushioning and grip, and comfortable clothing that allows you to move freely. Avoid clothing that is too loose, as it can bunch up or fall in ways that are distracting during certain poses. Fitted leggings or shorts and a comfortable top are ideal for most people.
Additional props can be helpful, especially for beginners. Two yoga blocks and a strap are inexpensive investments that can make poses more accessible and comfortable. Blocks bring the floor closer to you in standing forward folds and provide support in seated poses. A strap helps you reach your feet in poses where your flexibility may not yet allow it. A blanket or cushion can provide extra padding under the knees or support during seated meditation.
Choosing a Style
Yoga comes in many styles, ranging from gentle and restorative to vigorous and athletic. As a beginner, it is wise to start with a slower-paced style that emphasizes alignment and breath awareness. Hatha yoga is a general term for physical yoga and is often a good starting point, as classes tend to move at a moderate pace with clear instruction. Iyengar yoga places strong emphasis on precise alignment and makes extensive use of props, making it an excellent choice for those who want detailed guidance. Vinyasa or flow classes link breath with movement and can be more dynamic, so look for beginner-level or slow flow options if you are interested in this style. Yin yoga involves holding passive stretches for several minutes and is wonderful for releasing deep tension, though it is best complemented by a more active practice.
If attending in-person classes, arrive a few minutes early to introduce yourself to the instructor and mention any injuries or concerns you may have. Most teachers appreciate knowing that a beginner is in the room, as it allows them to offer appropriate modifications and extra guidance. If practicing at home using online videos, choose content specifically labeled for beginners and pay close attention to the alignment cues provided.
The Breath: Your Most Important Tool
Before exploring the poses themselves, it is essential to understand the role of breath in yoga. In fact, if you take only one thing away from this guide, let it be this: the breath is more important than the shape of the pose. In yoga, breath is considered the bridge between the body and the mind. When your breath is calm and steady, your mind tends to follow, and your body can relax into the postures more deeply.
The fundamental breathing technique in yoga is diaphragmatic breathing, also known as belly breathing or Ujjayi breath. To practice this, sit comfortably and place one hand on your belly. As you inhale through your nose, allow your belly to expand like a balloon, pushing your hand outward. As you exhale through your nose, gently draw your belly back toward your spine. The breath should be smooth, slow, and unhurried. With practice, you can add a slight constriction at the back of your throat, which creates a soft oceanic sound that helps anchor your attention.
Throughout your practice, use the breath as a gauge of your effort. If you find yourself holding your breath or breathing in a strained, shallow way, it is a sign that you may be pushing too hard. Ease out of the pose slightly until your breath returns to a smooth, steady rhythm. Over time, this breath awareness cultivated on the mat will begin to spill over into your daily life, helping you navigate stressful situations with greater calm and presence.
Essential Beginner Poses
The following poses form the foundation of most yoga practices. Spend time with each one, focusing on alignment and breath rather than depth. It is far better to do a pose with modest depth and excellent alignment than to push deeper with compromised form.
Mountain Pose (Tadasana)
Mountain Pose appears deceptively simple because it looks like you are just standing there. In reality, it is one of the most important and nuanced poses in yoga, teaching you the fundamental principles of alignment that carry through to every other posture. Mountain Pose cultivates groundedness, stability, and an upright posture that communicates confidence and ease.
To practice Mountain Pose, stand with your feet together or hip-width apart, whichever feels more stable. Spread your toes and press evenly through the four corners of each foot: the base of the big toe, the base of the little toe, and the inner and outer heels. Engage your thigh muscles slightly to lift your kneecaps without locking your knees back. Gently draw your tailbone down toward the floor to lengthen your lower back. Roll your shoulders up, back, and down, allowing your arms to hang naturally at your sides with palms facing forward. Imagine the crown of your head lifting toward the ceiling, lengthening your spine. Breathe deeply and hold for five to ten breaths, feeling the sensation of being both grounded and uplifted.
Downward-Facing Dog (Adho Mukha Svanasana)
Downward-Facing Dog is the quintessential yoga pose, appearing in nearly every style and sequence. It stretches the hamstrings, calves, and shoulders while strengthening the arms, core, and back. It also serves as a resting pose and a transition between other postures, making it one of the most versatile shapes in the practice.
Begin on your hands and knees in a tabletop position, with your wrists directly under your shoulders and your knees directly under your hips. Spread your fingers wide and press firmly through your knuckles and fingertips, distributing weight evenly across your hands. Tuck your toes under and, on an exhale, lift your knees off the floor, sending your hips up and back toward the ceiling. Your body should form an inverted V shape. It is completely normal and expected for your heels to hover above the floor as a beginner. Bend your knees as much as you need to in order to lengthen your spine. The priority is a long, straight back, not straight legs. Let your head hang between your upper arms, keeping your neck relaxed. Pedal your feet alternately by bending one knee and then the other to warm up the calves and hamstrings. Hold for five to ten deep breaths.
Child’s Pose (Balasana)
Child’s Pose is the ultimate resting posture and your sanctuary on the mat. Whenever a pose feels overwhelming or you need a moment to catch your breath, you can always return to Child’s Pose. It gently stretches the hips, thighs, and lower back while calming the nervous system and quieting the mind.
From a kneeling position, bring your big toes to touch and sit back on your heels. If sitting on your heels is uncomfortable, place a folded blanket between your calves and thighs for support. On an exhale, fold forward, bringing your forehead to rest on the mat. If your forehead does not reach the mat, stack your fists or place a block under your forehead for support. Extend your arms forward with palms facing down for an active stretch, or bring your arms back alongside your body with palms facing up for a more restorative variation. Close your eyes and breathe deeply into your back body, feeling your ribcage expand against your thighs with each inhalation. Stay here for as long as feels nourishing.
Warrior I (Virabhadrasana I)
Warrior I is a powerful standing pose that builds strength in the legs, opens the hips and chest, and cultivates focus and determination. It is named after the fierce warrior Virabhadra from Hindu mythology, and practicing it can help you tap into your own inner strength and resilience.
Begin in Mountain Pose at the front of your mat. Step your left foot back about three to four feet, turning the left foot out at approximately a forty-five-degree angle. Align your heels or keep them slightly wider for better balance. Bend your right knee until it is directly above your right ankle, aiming for a ninety-degree angle. Keep your left leg straight and strong, pressing through the outer edge of your back foot. On an inhale, sweep your arms overhead with palms facing each other or touching. Draw your shoulders down away from your ears and lift through your chest. Square your hips toward the front of the mat as much as your flexibility allows. Gaze forward or slightly up toward your thumbs. Hold for five to ten breaths before switching sides.
Warrior II (Virabhadrasana II)
Warrior II opens the hips and chest in a different orientation from Warrior I, with the hips open to the side rather than squared to the front. It is an excellent pose for building stamina and developing a sense of grounded presence.
From Mountain Pose, step your left foot back about three to four feet. This time, turn your left foot out to approximately ninety degrees so it is parallel to the back edge of your mat. Your right foot should point toward the front of the mat. Bend your right knee until it stacks directly over your right ankle. Raise your arms to shoulder height, parallel to the floor, with palms facing down. Gaze over your right fingertips. Your torso should remain upright, not leaning forward over the bent knee. Relax your shoulders away from your ears and breathe steadily. Feel the strength in your legs and the openness across your chest. Hold for five to ten breaths before switching sides.
Tree Pose (Vrikshasana)
Tree Pose is the quintessential balancing posture, and it is one of the most approachable poses for beginners. While balancing on one foot may feel challenging at first, it becomes easier with practice and offers valuable lessons in focus, patience, and the acceptance of wobbling. Falling out of Tree Pose and coming back into it is part of the practice, not a failure.
Begin in Mountain Pose. Shift your weight onto your left foot, grounding firmly through all four corners of that foot. When you feel stable, lift your right foot and place the sole against your left inner thigh, with your toes pointing down. If this is not accessible, place the sole against your left calf or even your ankle, but avoid placing it directly on the knee joint to protect that vulnerable area. Press your foot firmly into your leg and your leg firmly back into your foot, creating a stable connection. Bring your palms together at your heart center, or on an inhale, extend your arms overhead like branches. Find a focal point on the floor or wall in front of you to help with balance. Breathe calmly and steadily. Hold for five to ten breaths before switching sides.
Cat-Cow Stretch (Marjaryasana-Bitilasana)
Cat-Cow is a gentle, flowing movement that warms up the spine, releases tension in the back and neck, and coordinates breath with movement. It is an excellent way to begin any practice and can also be used as a standalone stretch after a long day of sitting at a desk.
Begin on your hands and knees in a tabletop position. As you inhale, drop your belly toward the mat, lift your tailbone and chest toward the ceiling, and gaze slightly upward without straining your neck. This is Cow Pose. As you exhale, round your spine toward the ceiling like a stretching cat, tuck your chin toward your chest, and draw your tailbone down. This is Cat Pose. Continue flowing between these two positions at the pace of your own breath, inhaling into Cow and exhaling into Cat. Move slowly and mindfully, feeling each vertebra articulate one at a time. Practice for ten to fifteen rounds.
Bridge Pose (Setu Bandhasana)
Bridge Pose is a gentle backbend that strengthens the glutes, hamstrings, and lower back while opening the chest and hip flexors. For many people who spend long hours sitting, the hip flexors become chronically tight, and Bridge Pose provides welcome relief. It is also a preparatory pose for deeper backbends.
Lie on your back with your knees bent and feet flat on the mat, hip-width apart and parallel. Your feet should be close enough that you can graze your heels with your fingertips. Rest your arms alongside your body with palms facing down. On an inhale, press through your feet and lift your hips toward the ceiling. Keep your thighs parallel rather than letting them splay outward. You can clasp your hands beneath your back and roll your shoulders under for a deeper chest opening. Keep your neck long and your gaze toward the ceiling. Hold for five to ten breaths, then slowly roll your spine down one vertebra at a time on an exhale.
Seated Forward Fold (Paschimottanasana)
Seated Forward Fold is a classic pose that stretches the entire back of the body, including the hamstrings, calves, and spine. For beginners, the key is to focus on lengthening the front of the body rather than rounding the back to reach the feet.
Sit on the mat with your legs extended straight in front of you. If your lower back rounds significantly, sit on a folded blanket to elevate your hips, which will help you maintain a longer spine. Flex your feet, pressing through your heels and drawing your toes back toward your shins. On an inhale, lengthen your spine and reach your arms overhead. On an exhale, hinge forward from your hips, keeping your spine as long as possible. Rest your hands on your shins, ankles, or feet, wherever they naturally land without forcing the stretch. If you have a strap, loop it around the balls of your feet and hold the ends to help you maintain length. Relax your head and neck. Focus on deepening the pose with each exhalation rather than forcing depth. Hold for ten to fifteen breaths.
Corpse Pose (Savasana)
Savasana, or Corpse Pose, is deceptively simple but profoundly important. It is practiced at the end of every yoga session and is considered by many teachers to be the most challenging pose of all because it requires complete stillness and surrender. Savasana allows your body and nervous system to integrate the benefits of your practice and serves as a bridge between the inward focus of yoga and the outward engagement of daily life.
Lie flat on your back with your legs extended and slightly apart. Let your feet relax and fall open naturally. Rest your arms alongside your body with a slight distance from your torso, palms facing up. Close your eyes. Allow your whole body to feel heavy, as if it were sinking into the mat. Release any tension in your jaw, your forehead, and the space between your eyebrows. Bring your awareness to your breath, letting it flow naturally without controlling it. If your mind wanders, gently guide your attention back to the sensation of breathing. Stay in Savasana for at least five minutes. To exit, begin to deepen your breath, gently wiggle your fingers and toes, and slowly roll onto your right side before pressing yourself up to a seated position.
Putting It All Together: A Beginner-Friendly Sequence
The poses described above can be practiced individually, but they are most powerful when linked together in a sequence. Here is a simple, accessible sequence that you can follow at home. Spend approximately five to ten breaths in each pose, moving mindfully and breathing deeply throughout.
1. Centering: Begin seated in a comfortable cross-legged position. Close your eyes and take ten deep breaths, setting an intention for your practice.
2. Warm-Up: Come to hands and knees for Cat-Cow stretches. Flow through ten to fifteen rounds, moving with your breath.
3. Downward-Facing Dog: From tabletop, tuck your toes and lift your hips into Downward-Facing Dog. Pedal your feet and breathe deeply for five to eight breaths.
4. Mountain Pose: Walk or step forward to the top of your mat. Stand in Mountain Pose for five breaths, grounding and centering yourself.
5. Warrior I: Step your left foot back into Warrior I on the right side. Hold for five to eight breaths. Step forward and repeat on the left side.
6. Warrior II: From Mountain Pose, step your left foot back into Warrior II on the right side. Hold for five to eight breaths. Step forward and repeat on the left side.
7. Tree Pose: Return to Mountain Pose and practice Tree Pose on each side for five to eight breaths.
8. Downward-Facing Dog: Step back to Downward-Facing Dog and hold for five breaths.
9. Bridge Pose: Lower to your back and practice Bridge Pose two or three times, holding for five to eight breaths each time.
10. Seated Forward Fold: Come to a seated position and practice Seated Forward Fold for ten to fifteen breaths.
11. Child’s Pose: From seated, come to your knees and fold into Child’s Pose for as long as feels restorative.
12. Savasana: Lie on your back for a final relaxation of five to ten minutes.
Common Mistakes and How to Avoid Them
As a beginner, making mistakes is not only normal but an essential part of the learning process. However, being aware of some common pitfalls can help you practice more safely and effectively.
Locking Your Joints: In standing poses, it is common to lock the knees back or hyperextend the elbows. This puts stress on the joints and prevents the muscular engagement that makes poses effective. Instead, maintain a micro-bend in your joints to keep the surrounding muscles active and supportive.
Holding Your Breath: When concentrating on a challenging pose, many beginners unconsciously hold their breath. This creates tension and deprives your muscles of oxygen. Make breath awareness your top priority. If you notice you are holding your breath, ease out of the pose slightly until you can breathe smoothly again.
Comparing Yourself to Others: In a class setting, it is tempting to glance around and compare your pose to those of more experienced practitioners. This is counterproductive. Yoga is a personal practice, and your only reference point should be your own body and your own experience. What someone else’s pose looks like has nothing to do with your practice.
Pushing Through Pain: There is an important distinction between the sensation of a stretch, which may feel intense but not sharp, and actual pain, which signals that something is wrong. Sharp, shooting, or joint-specific pain is a clear signal to stop. Yoga should never hurt. Learn to distinguish between discomfort that is productive and pain that is harmful.
Skipping Savasana: Many beginners are tempted to skip the final relaxation, viewing it as unimportant or a waste of time. This is a mistake. Savasana is where the benefits of your practice are integrated into your nervous system. Rushing out of your practice without Savasana is like baking a cake and turning off the oven halfway through.
The Benefits Beyond Flexibility
While improved flexibility is often the most visible benefit of a regular yoga practice, it is far from the only one. Research has documented a wide range of physical and mental health benefits associated with yoga.
Stress Reduction: Yoga’s combination of movement, breath work, and mindfulness activates the parasympathetic nervous system, also known as the rest-and-digest response. This lowers cortisol levels, reduces blood pressure, and creates a measurable sense of calm. In a world where chronic stress is endemic, this may be yoga’s most valuable gift.
Improved Strength and Balance: Many yoga poses require you to support your own body weight in novel ways, building functional strength throughout the body. Balancing poses, in particular, strengthen the stabilizing muscles around the ankles, knees, and core, which can help prevent falls and injuries in daily life.
Better Sleep: Regular yoga practice has been shown to improve sleep quality and reduce the time it takes to fall asleep. A gentle evening practice, even just ten to fifteen minutes of restorative poses and breathing, can signal to your body that it is time to wind down.
Enhanced Body Awareness: Yoga cultivates proprioception, which is the awareness of your body’s position in space. This heightened body awareness can improve posture, reduce the risk of injury, and help you notice tension patterns so you can address them before they become chronic issues.
Establishing a Consistent Practice
The most important factor in experiencing the benefits of yoga is consistency. A fifteen-minute daily practice is far more valuable than a two-hour session once every two weeks. Here are some strategies for building a sustainable yoga habit.
Start Small: Commit to just ten or fifteen minutes per day. This is a manageable amount of time that even the busiest person can find. As the habit becomes established, you can naturally extend your sessions.
Create a Dedicated Space: Set aside a corner of your home for yoga, even if it is just enough room for your mat. Having a designated practice space removes the barrier of having to clear an area each time.
Practice at the Same Time Each Day: Linking your practice to an existing habit, such as rolling out your mat right after waking up or before your evening shower, helps anchor it in your routine.
Use Resources: There are countless high-quality yoga videos available online for free, catering to every level and style. Find a teacher whose style resonates with you and follow their guidance. Apps and online subscriptions also offer structured programs for beginners.
Be Kind to Yourself: Some days, your practice will feel wonderful. Other days, it will feel stiff, distracted, and frustrating. Both experiences are valid and valuable. The practice is not about having a good session every time. It is about showing up consistently, regardless of how you feel.
Conclusion: The Practice of a Lifetime
Yoga is not a destination to be reached but a journey to be experienced. There is no finish line, no final pose that means you have arrived. The practice continually unfolds, revealing new layers of awareness, strength, and peace as you deepen your relationship with your body and your breath.
As you begin your yoga journey, hold these words close: be patient, be curious, and be kind to yourself. Your body will change and open at its own pace. Your mind will resist stillness and then gradually learn to rest in it. This is all part of the process. The simple act of stepping onto your mat, again and again, is the practice. Everything else is a bonus.
Whether you are seeking to touch your toes, quiet your racing thoughts, or simply carve out a pocket of peace in a busy day, yoga has something to offer you. Roll out your mat, take a deep breath, and begin. Your practice is waiting.